After you get your hands on Android, you will find the most useful widget is the ListView. You may also feel that it’s required on every activity. Android being Open-Source, it is the most flexible mobile platform out there. Everyone, wants to customize it according to their taste. You would hardly see an app that uses the default look and feel of the widgets. But with flexibility comes complexity.
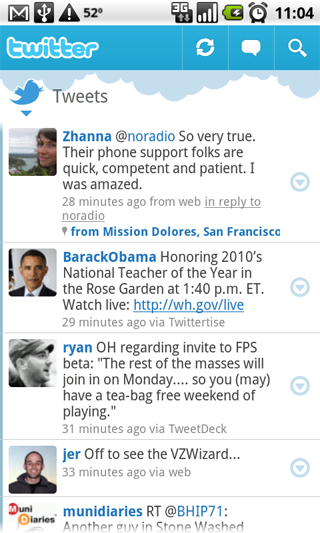
You can judge the importance of the ListView widget by the fact that there was a complete session in Google I/O on ListViews. A ListView can take any shape from a colorful contact list in whatsapp to a text filled tweet in twitter.

Unlike other tutorials, I want this article to be more general and I would try my best so that you can create a listview according to your needs rather than just a custom listview developed in this article.
By default android renders only a single TextView in each of the ListView’s row and binds string data through an adapter. But you can customize the ListView’s row and place your own widget items in it and then bind data through your own custom adapter.
First create a simple layout and declare a ListView in it. You can also place other components in this layout if you want, like a TextView to give some heading or information.
main.xml
|
1 2 3 4 5 6 7 8 9 10 11 12 13 14 15 16 17 18 19 20 21 22 23 24 25 26 27 |
<?xml version="1.0" encoding="utf-8"?> <LinearLayout xmlns:android="http://schemas.android.com/apk/res/android" android:layout_width="match_parent" android:layout_height="match_parent" android:orientation="vertical" android:padding="2dp" > <ListView android:id="@+id/MessageList" android:layout_width="match_parent" android:layout_height="0dip" android:layout_weight="1" > </ListView> </LinearLayout> |
Now we will create the layout for listview row. This will be the layout in which you can customize your list row. This will be re-inflated every time a new entry is made to the listview. The widgets in this layout will depend on your requirement, like if you are developing a contact list then you will only need a ImageView and TextView or if you are developing a songs list then you might consider adding another TextView for the artist name apart from album icon and album name.
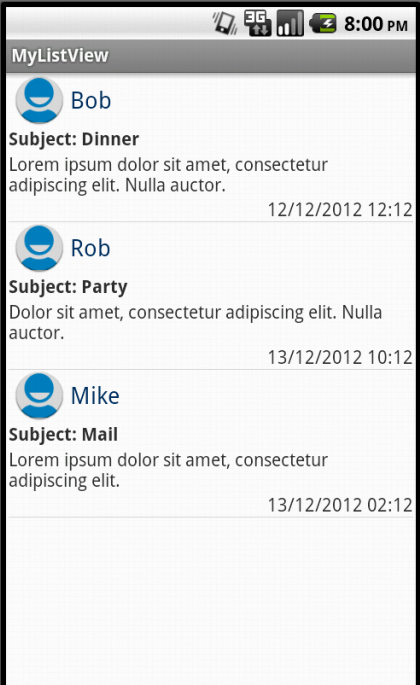
For this tutorial I made something like a message app which includes a ImageView and 4 TextViews in each list item. Here is the xml layout for the same.
list_item_message.xml
|
1 2 3 4 5 6 7 8 9 10 11 12 13 14 15 16 17 18 19 20 21 22 23 24 25 26 27 28 29 30 31 32 33 34 35 36 37 38 39 40 41 42 43 44 45 46 47 48 49 50 51 52 53 54 55 56 57 58 59 60 61 62 63 64 65 66 67 68 69 70 71 |
<?xml version="1.0" encoding="utf-8"?> <LinearLayout xmlns:android="http://schemas.android.com/apk/res/android" android:layout_width="match_parent" android:layout_height="match_parent" android:orientation="vertical" > <LinearLayout android:layout_width="match_parent" android:layout_height="wrap_content" android:orientation="horizontal" > <ImageView android:id="@+id/icon" android:layout_width="wrap_content" android:layout_height="40dp" /> <TextView android:id="@+id/From" android:layout_width="fill_parent" android:layout_height="wrap_content" android:layout_gravity="center" android:textAppearance="?android:attr/textAppearanceMedium" android:textColor="#003366" /> </LinearLayout> <TextView android:id="@+id/subject" android:layout_width="fill_parent" android:layout_height="wrap_content" android:textStyle="bold" /> <TextView android:id="@+id/description" android:layout_width="fill_parent" android:layout_height="wrap_content" /> <TextView android:id="@+id/time" android:layout_width="fill_parent" android:layout_height="wrap_content" android:gravity="right" /> </LinearLayout> |
Now we will create a simple class that would help us in binding data and getting the reference to a particular component’s value in each row.
public class MessageDetails {
int icon ;
String from;
String sub;
String desc;
String time;
public String getName() {
return from;
}
public void setName(String from) {
this.from = from;
}
public String getSub() {
return sub;
}
public void setSub(String sub) {
this.sub = sub;
}public int getIcon() {
return icon;
}
public void setIcon(int icon) {
this.icon = icon;
}public String getTime() {
return time;
}
public void setTime(String time) {
this.time = time;
}public String getDesc() {
return desc;
}
public void setDesc(String desc) {
this.desc = desc;
}
}
Next up is the brain of our ListView, yes our very own Custom Adapter.
|
1 2 3 4 5 6 7 8 9 10 11 12 13 14 15 16 17 18 19 20 21 22 23 24 25 26 27 28 29 30 31 32 33 34 35 36 37 38 39 40 41 42 43 44 45 46 47 48 49 50 |
public class CustomAdapter extends BaseAdapter { private ArrayList<MessageDetails> _data; Context _c; CustomAdapter (ArrayList<MessageDetails> data, Context c){ _data = data; _c = c; } public int getCount() { // TODO Auto-generated method stub return _data.size(); } public Object getItem(int position) { // TODO Auto-generated method stub return _data.get(position); } public long getItemId(int position) { // TODO Auto-generated method stub return position; } public View getView(int position, View convertView, ViewGroup parent) { // TODO Auto-generated method stub View v = convertView; if (v == null) { LayoutInflater vi = (LayoutInflater)_c.getSystemService(Context.LAYOUT_INFLATER_SERVICE); v = vi.inflate(R.layout.list_item_message, null); } ImageView image = (ImageView) v.findViewById(R.id.icon); TextView fromView = (TextView)v.findViewById(R.id.From); TextView subView = (TextView)v.findViewById(R.id.subject); TextView descView = (TextView)v.findViewById(R.id.description); TextView timeView = (TextView)v.findViewById(R.id.time); MessageDetails msg = _data.get(position); image.setImageResource(msg.icon); fromView.setText(msg.from); subView.setText("Subject: "+msg.sub); descView.setText(msg.desc); timeView.setText(msg.time); return v; } } |
Our custom adapter takes in a ArrayList of our MessageDetails class and a context as parameters. You can easily notice that all the work is done by the getView method which is called every time a list item is instantiated.
It returns a View corresponding to the data at the specified position. Here ViewGroup is the parentView i.e the ListView. We check if the convertView is not null which helps android to re-use the old View and reduce battery consumption.
I have used app’s icon as the image for all my list item but you can use your own algorithm.
Now we are ready with the setup, we just need to fill our data into the ListView. So here’s the onCreatemethod:
public class Messages extends Activity {
ListView msgList;
ArrayList<MessageDetails> details;
AdapterView.AdapterContextMenuInfo info;@Override
protected void onCreate(Bundle savedInstanceState) {
// TODO Auto-generated method stub
super.onCreate(savedInstanceState);
setContentView(R.layout.main);msgList = (ListView) findViewById(R.id.MessageList);
details = new ArrayList<MessageDetails>();
MessageDetails Detail;
Detail = new MessageDetails();
Detail.setIcon(R.drawable.ic_launcher);
Detail.setName(“Bob”);
Detail.setSub(“Dinner”);
Detail.setDesc(“Lorem ipsum dolor sit amet, consectetur adipiscing elit. Nulla auctor.”);
Detail.setTime(“12/12/2012 12:12”);
details.add(Detail);Detail = new MessageDetails();
Detail.setIcon(R.drawable.ic_launcher);
Detail.setName(“Rob”);
Detail.setSub(“Party”);
Detail.setDesc(“Dolor sit amet, consectetur adipiscing elit. Nulla auctor.”);
Detail.setTime(“13/12/2012 10:12”);
details.add(Detail);Detail = new MessageDetails();
Detail.setIcon(R.drawable.ic_launcher);
Detail.setName(“Mike”);
Detail.setSub(“Mail”);
Detail.setDesc(“Lorem ipsum dolor sit amet, consectetur adipiscing elit.”);
Detail.setTime(“13/12/2012 02:12”);
details.add(Detail);msgList.setAdapter(new CustomAdapter(details , this));
}
So, here we are with our very own custom listview, piece of cake naa?
 |
| Cool? |
Now when you have your own ListView you may also want to add some functionality to it like a context menu and click listeners.
Context Menu:
First, register your ListView for context menu on onCreate.
registerForContextMenu(msgList);
and here is the onCreateContextMenu and onContextItemSelected.
|
1 2 3 4 5 6 7 8 9 10 11 12 13 14 15 16 17 18 19 20 21 22 23 24 25 26 27 28 29 |
@Override public void onCreateContextMenu(ContextMenu menu, View v, ContextMenuInfo menuInfo) { // TODO Auto-generated method stub super.onCreateContextMenu(menu, v, menuInfo); info = (AdapterContextMenuInfo) menuInfo; menu.setHeaderTitle(details.get(info.position).getName()); menu.add(Menu.NONE, v.getId(), 0, "Reply"); menu.add(Menu.NONE, v.getId(), 0, "Reply All"); menu.add(Menu.NONE, v.getId(), 0, "Forward"); } @Override public boolean onContextItemSelected(MenuItem item) { if (item.getTitle() == "Reply") { //Do your working } else if (item.getTitle() == "Reply All") { //Do your working } else if (item.getTitle() == "Reply All") { //Do your working } else { return false; } return true; } |
 |
| Context Menu |
List Item Click listener:
For having a item click listener on your lisview you have to add the following lines to each of your widget in the list_item_message.xml.
android:focusable=”false”
android:focusableInTouchMode=”false”
Here’s the click listener:
|
1 2 3 4 5 6 7 |
msgList.setOnItemClickListener(new OnItemClickListener() { public void onItemClick(AdapterView a, View v, int position, long id) { String s =(String) ((TextView) v.findViewById(R.id.From)).getText(); Toast.makeText(Messages.this, s, Toast.LENGTH_LONG).show(); } }); |
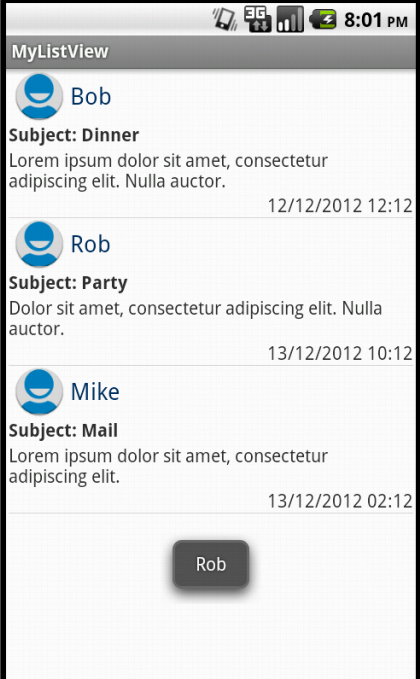 |
| Item Click Listener |
We retrieve the text in the ‘From TextView ‘ by this line (String) ((TextView) v.findViewById(R.id.From)).getText(); which you can also retrieve through this code: details.get(position).getName().
Click Listener for a specific component:
You can also have click listener for a specific widget. For this tutorial, I have implemented it on the ImageView which made the most sense. Click listener for a widget has to be added on the getView method in our Custom Adapter. So here’s is the modified getView method. Notice you have to declare the int position as final.
|
1 2 3 4 5 6 7 8 9 10 11 12 13 14 15 16 17 18 19 20 21 22 23 24 25 26 27 28 29 30 31 32 33 34 35 36 37 38 39 40 41 42 43 44 45 46 47 48 49 50 51 52 53 54 55 56 57 58 59 60 61 62 63 64 65 66 67 68 69 70 |
public class CustomAdapter extends BaseAdapter { private ArrayList<MessageDetails> _data; Context _c; CustomAdapter (ArrayList<MessageDetails> data, Context c){ _data = data; _c = c; } @Override public int getCount() { // TODO Auto-generated method stub return _data.size(); } @Override public Object getItem(int position) { // TODO Auto-generated method stub return _data.get(position); } @Override public long getItemId(int position) { // TODO Auto-generated method stub return position; } @Override public View getView(final int position, View convertView, ViewGroup parent) { // TODO Auto-generated method stub View v = convertView; if (v == null) { LayoutInflater vi = (LayoutInflater)_c.getSystemService(Context.LAYOUT_INFLATER_SERVICE); v = vi.inflate(R.layout.list_item_message, null); } ImageView image = (ImageView) v.findViewById(R.id.icon); TextView fromView = (TextView)v.findViewById(R.id.From); TextView subView = (TextView)v.findViewById(R.id.subject); TextView descView = (TextView)v.findViewById(R.id.description); TextView timeView = (TextView)v.findViewById(R.id.time); MessageDetails msg = _data.get(position); image.setImageResource(msg.icon); fromView.setText(msg.from); subView.setText("Subject: "+msg.sub); descView.setText(msg.desc); timeView.setText(msg.time); @Override image.setOnClickListener(new OnClickListener() { public void onClick(View v) { // TODO Auto-generated method stub AlertDialog.Builder adb=new AlertDialog.Builder(Messages.this); adb.setMessage("Add To Contacts?"); adb.setNegativeButton("Cancel", null); final int selectedid = position; final String itemname= (String) _data.get(position).getName(); adb.setPositiveButton("OK", new AlertDialog.OnClickListener() { public void onClick(DialogInterface dialog, int which) { //Your working }}); adb.show(); } }); |
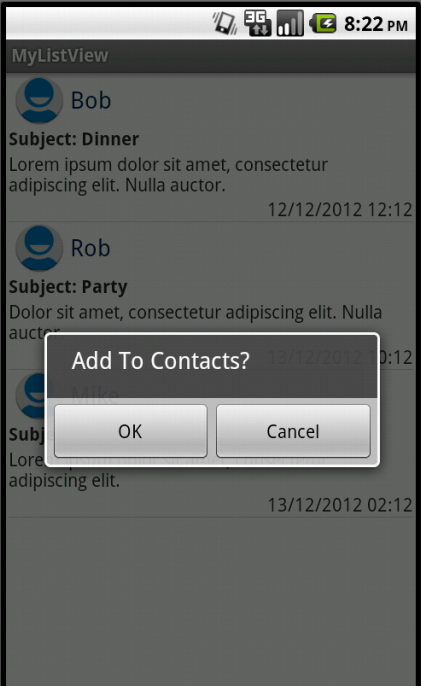 |
| ImageView Click Listener |
I hope I helped you in making your own custom ListView. Please Comment if you have any query and remember sharing is caring!
[UPDATE]
The thing you asked the most in comments – here’s the link to download the whole Eclipse Project. Hope this will clear all your doubts and issues if faced any.
Don’t forget to like ThePCWizard on Facebook for latest tech news, geeky discussions and best of tech trolls. Also subscribe to RSS feeds and YouTube channel for being updated with the latest tech tutorials.