Ever wondered how you are able to capture your computer screen from tools like Snipping Tool, Jing or maybe just a print screen button. Now you can not only know it but built one. Making a full-feature screen capture utility for end consumer maybe difficult and not effective altogether as it’s more of native thing rather than cross-platform. Here’s a guide to take screenshots of your screen or portions of it.
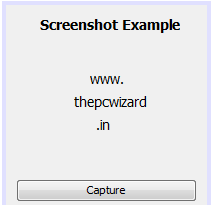
I have designed a simple GUI form using Netbeans GUI Builder that would make the working easy & clear.
Don’t concentrate on the UI for now, just know that we will do all our functions on button click of capture button. (i.e actionPerformed event).

A full screen capture is not difficult, you just need to do 3 things as you may have wondered.
1 Getting the dimension (the area to be captured)
2 Then filing the area with content (i.e your screen)
3 and finally writing (saving the image to a file)
So here’s the method that does the 3 tasks mentioned above.
 public void captureScreen(String fileName) {
        try {

            System.out.println("Creating a delay of " + delay +

            " second(s)...");

            long time = Long.valueOf(delay) * 1000L;

            Thread.sleep(time);

            Rectangle screenRect = new Rectangle(Toolkit.getDefaultToolkit().getScreenSize());

            BufferedImage capture = new Robot().createScreenCapture(screenRect);

            ImageIO.write(capture, "png", new File(fileName));

         } catch (InterruptedException ex) {

           System.out.println("Error while sleeping thread" + ex);

         } catch (IOException | AWTException ex) {

           System.out.println(ex);

        }

     }
Explanation: We get width and height of our computer screen using Toolkit class and then create a Rectangle with that dimension. Then we extract the graphics displayed within that rectangle using Robot class. Finally, we write it to a file and save it as a image. The string passed into the method will be used to name the image captured. So, here’s the calling statement:
private void jButton1ActionPerformed(java.awt.event.ActionEvent evt) {
captureScreen(“capture.png”);
}
As of now, the image will be saved to same directory as that of your app. But if you want to specify a location, you should pass the complete path to the method. The below statement saves the image in the Pictures library on Windows.
captureScreen(“C:\Users\Public\Pictures\capture.png”);
Open the directory to see your captured image. You may notice that the button’s pressed state is visible in the screenshot. To have a workaround for this, check the important notes[2] section at the end of the post.
Capture the app’s GUI
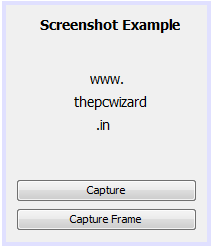
Maybe you don’t want a full screen capture, but just allow users to capture the app’s state as image. In this case, you may consider only capturing the JFrameForm which is being displayed. So, here’s the new updated UI and the method which fulfills your need:
public void captureScreen(int delay, String fileName) {
       try {

           System.out.println("Creating a delay of " + delay +

           " second(s)...");

            long time = Long.valueOf(delay) * 1000L;

            Thread.sleep(time);

            Rectangle screenRect = new Rectangle(Toolkit.getDefaultToolkit().getScreenSize());

            BufferedImage capture = new Robot().createScreenCapture(screenRect);

            ImageIO.write(capture, "png", new File(fileName));

          } catch (InterruptedException ex) {

            System.out.println("Error while sleeping thread" + ex);

         } catch (IOException | AWTException ex) {

          System.out.println(ex);

         }

    }
Explanation: We have just replaced the way we get the dimension and filling of the pixels. This time for the dimension we pass the JFrame as a parameter and get width and height through getBounds() method. Also, this time as we are not using the Toolkit and Robot classes, the process is quick enough that you might not see button being pressed in the final screenshot.
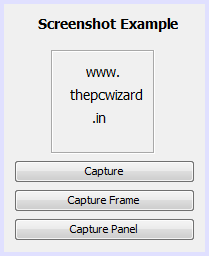
Capture the GUI’s part
Now let’s move onto an another example. Let’s say, you only want to save a part of UI for example maybe an image and text in a Panel, a graph or table. So, I have added a JPanel and another button to capture only the JPanel. Here’s the new UI.
And here’s almost the same method.
public void capturePanel (JPanel argPanel, String fileName) {

        Rectangle rec = argPanel.getBounds();

        BufferedImage capture = new BufferedImage(rec.width, rec.height,

                                        BufferedImage.TYPE_INT_ARGB);

        argPanel.paint(capture.getGraphics());


       try {


        ImageIO.write(capture, "png", new File(fileName));


    } catch (IOException ioe) {

        System.out.println(ioe);

    }

}
Here’s the output:

So that means you can capture anything for which you can get it’s width and height.
Important Notes
1 Why PNG?
We are using PNG as the output format as it’s thought be the best format for Screenshots. You can use JPEG or BMP instead but they are considered more relevant for photos and drawings respectively. Moreover, they would just unnecessary increase the size of the image. Another thing to notice is that we are passing the filename as capture.png. If we just pass the file name as capture, then although the file will be written correctly but your OS(Windows/Mac) will not be able to relate it with an app and thus will provide with ‘Open With…’ Dialog.
2 Workaround for Button’s pressed state
Button’s state remains pressed as we are doing a little bit of heavy task on the UI thread. UI thread get’s stuck for few milliseconds and the button remains pressed. We can simply follow the programming fundamentals and do the capturing in a new thread to get it right. So, here’s the new calling function:
Thread t = new Thread(new Runnable(){
@Override
public void run() {
captureScreen(“C:\Users\Public\Pictures\capture.png”);
}
});
t.start();
If you are capturing only your app then you can also consider to remove the button from your capturing area. This can be easily done while giving the dimensions to BufferedImage Object. So if your button is placed at the bottom of your form, then you can cut-off the bottom 40px from the capturing area.
BufferedImage capture = new BufferedImage(rec.width, rec.height – 40,
BufferedImage.TYPE_INT_ARGB);
3 Creating delays
Another concept that could be incorporated in a capturing program is the ability to capture after a certain time delay. Delays allows the user to get the screen ready for the capture i.e opening some apps or re-arranging the opened windows. Here’s the new captureScreen() method supporting the feature to create a delay before the final capture.
public void captureScreen(int delay, String fileName) {

       try {

           System.out.println("Creating a delay of " + delay +

               " second(s)...");

           long time = Long.valueOf(delay) * 1000L;

           Thread.sleep(time);

           Rectangle screenRect = new Rectangle(Toolkit.getDefaultToolkit().getScreenSize());

           BufferedImage capture = new Robot().createScreenCapture(screenRect);

           ImageIO.write(capture, "png", new File(fileName));

       } catch (InterruptedException ex) {

           System.out.println("Error while sleeping thread" + ex);

       } catch (IOException | AWTException ex) {

           System.out.println(ex);

       }

   }
The new calling statement:
captureScreen(5, “C:\Users\Public\Pictures\capture.png”);
This will create a delay of 5 seconds i.e 5000 milliseconds. In this time you can re-size your windows, hide your own app, bring some apps to front.
4 File separator
As JAVA is a cross-platform technology your app would be executed in many types OS which may have a different type of File Structure or File Management System. For example, some strange operating systems from other world use a ‘:’ i.e a colon as a File separator. So, it’s is not recommended to hard code double backslash or any other character in the directory path. Play it safe by using File.separator in the path:
captureFrame(this, “C:”+File.separator+”Users”+File.separator+”Public”+File.separator+”Pictures”+File.separator+”capturedFrame.png”);
5 Netbans Project
For all the Netbeans Beginners here is the link to download the whole project which also contains an executable jar file. To know how to turn your JFrameForm into a executable jar file read this article.
Great effort !!!!
very great effort
Great Article. Thanks. It helped me a lot.
But can you guide me how to convert an Array of Images into a Video Streaming to send it over a Network with Possible Minimum Delay.
How can i learn software development using java please suggest best way
Thanks